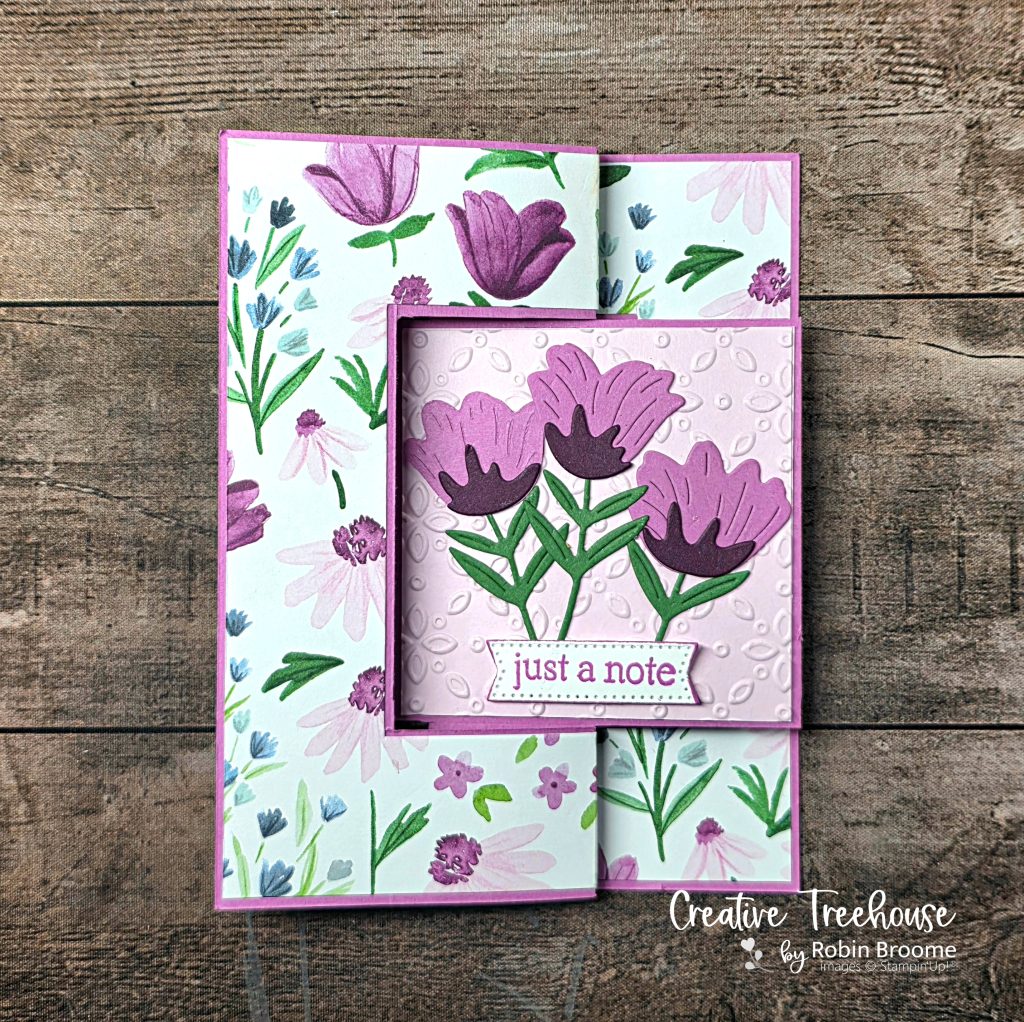
After seeing Connie Stewart’s Flip Flap Fun Fold card, I wanted to give it a try. She basically created her own DSP by stamping on cardstock. Because this fun fold needs the weight of cardstock, I decided to see if I could figure out the measurements to add DSP to cardstock.
It took some trial and error. But, I did come up with measurements to cut DSP to adhere to cardstock. I love the look of the cardstock border around the DSP. You can find the measurements below.
When I made this card on my YouTube LIVE, I didn’t really have a good idea of what needed to go on the front square. After the LIVE, I played around with varies pieces. In the end, I decided on an embossed piece along with some of the floral dies that coordinate with the DSP.
I used the Pretty Florals dies for the front of the card and the Pretty Florals stamp set for the inside of the card. The lovely eyelet embossing folder helped add the perfect background to the front square. When the LIVE ended, the front square was just plain Bubble Bath cardstock. But, I promised the viewers I would come up with something to go in the square.
Please note that many of the products that I used to create this card are on the Last Chance List. However, you can use other stamp sets, dies, and paper to create an equally lovely card. All you need is the basic design and measurements.
The Fun Fold
Susan calls this fun fold a flip flap. Whatever the fold is, it really is loads of fun. I love how it twists and pops when the card is opened. If you haven’t tried this fun fold, you should. It isn’t too difficult. The Stampin’ Up! paper trimmer is the perfect tool for the job – making it easy to see where to cut.
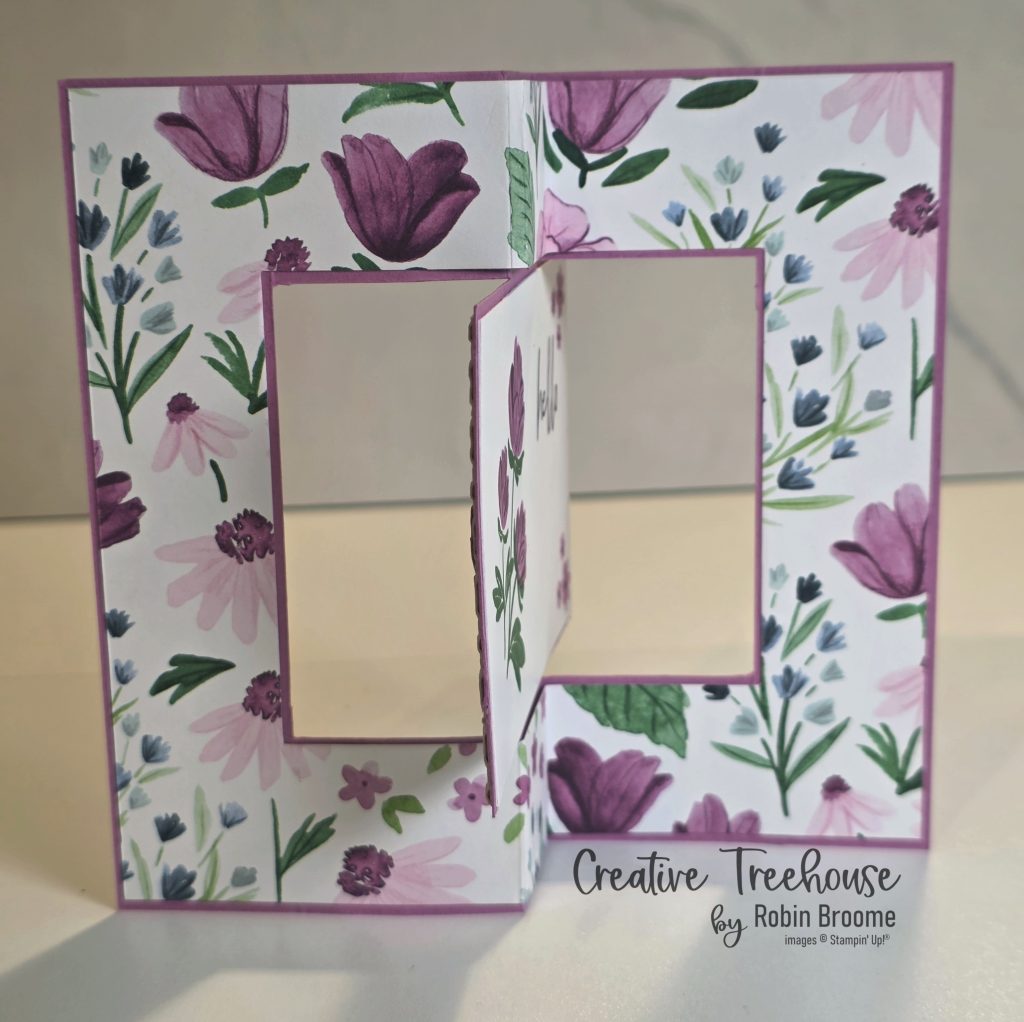
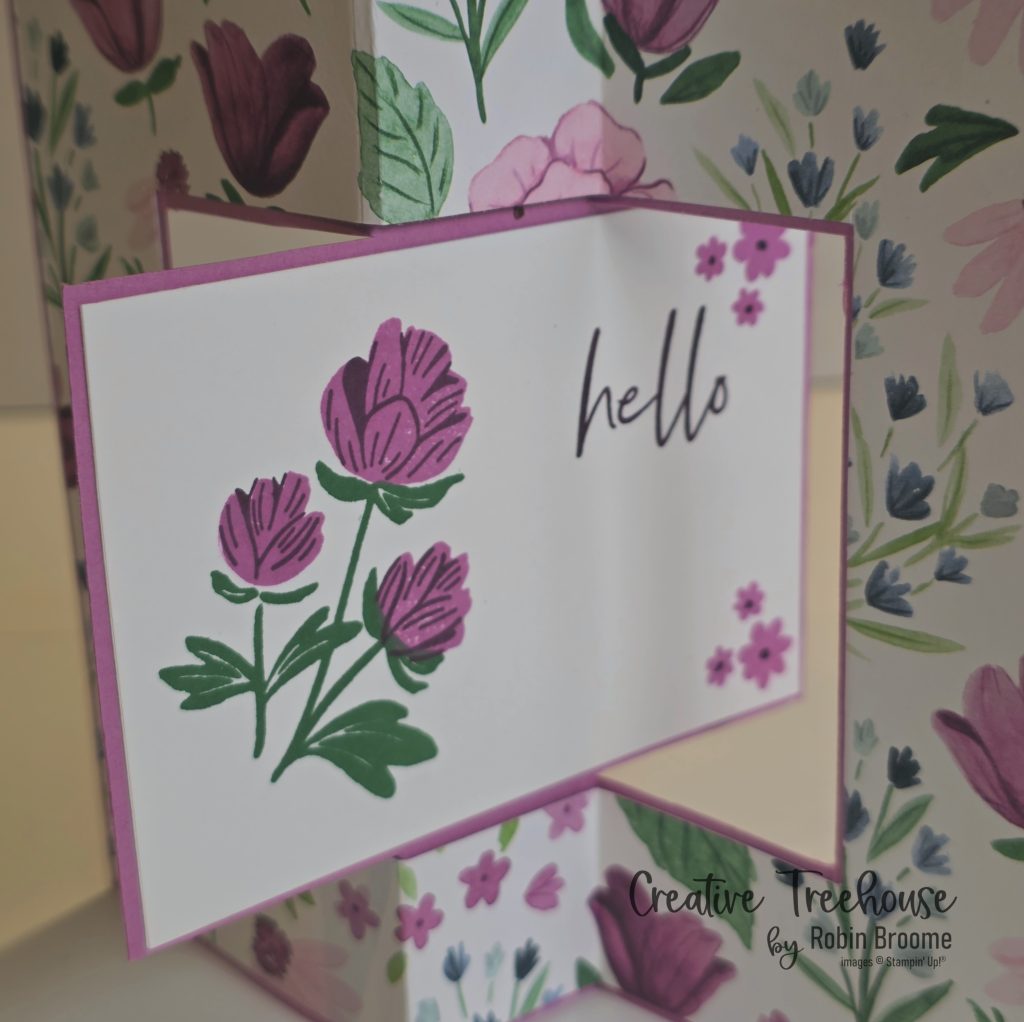
What do you think? Do you love this fun fold as much as I do? Thanks so much for dropping by the Creative Treehouse and checking it out. Please leave a comment and let me know you were here.
Looking for more treehouse inspiration?
Shopping – need some new crafting supplies? I’ve got you covered. Just click on my online store to explore all the cool products that Stampin’ Up! sells.
Weekly Newsletter – in my weekly newsletter, you’ll find a calendar of classes, featured cards, news about SU sales, invites to sign up for upcoming classes and much more. If you click on this link, you will be able to sign up for my newsletter and get a free pdf for doing so.
YouTube LIVE – want to help me create a card each week? Well, on Thursday nights at 8pm (ET) I go LIVE in the Treehouse and viewers get to pick the colors, sentiments, and embellishments for the card. People from all over the globe join in the crafting fun. Sign up for my YouTube channel and get notified when I go LIVE.
Pinterest – I love the Pinterest platform to gain inspiration in my card making. Here is my Pinterest channel you can hopefully be inspired by.
Facebook Private Group – want some more insider info? You can request to join my private FB group (Crafting in the Creative Treehouse) or just hang out in my public FB business page.
Measurements
- start with a 5-1/2 x 6-3/4 piece of cardstock (score @ 1-1/4 on all four sides)
- with the 6-3/4 side on the top, score at 2-3/4 and 4
- for cutting the insides I recommend watching Connie’s video
- for the DSP start with a 5-3/8 x 6-5/8 piece.
- With the 6-5/8 inch side on top, score at 2-11/16 and 3-15/16.
- to cut out the rectangle, start with the 6-5/8 inch side on top. Place your paper at the 1-1/8 mark. Bring your cutting blade down to the 1-1/8 mark and cut from that mark down to the 4-1/4 mark. Rotate your paper 180 degrees and do the same cutting on the opposite side. Now turn the paper with the 5-3/8 on the top. Place you paper at the 1-1/8 mark. You should be able to move the blade to meet the other perpendicular lines to complete the rectangular cut.
- The front square is 2-7/8 x 2-7/8
- The inside Basic White piece is 2-7/8 x 4-1/8
Products I used for the floral fun fold
Product List
![Pretty Florals Bundle [ 165179 ]](https://assets1.tamsnetwork.com/images/EC042017NF/165179s.jpg "Pretty Florals Bundle [ 165179 ]")
![Florals In Bloom 12" X 12" (30.5 X 30.5 Cm) Designer Series Paper & Sticker Sheet (English) [ 166643 ]](https://assets1.tamsnetwork.com/images/EC042017NF/166643s.jpg "Florals In Bloom 12\" X 12\" (30.5 X 30.5 Cm) Designer Series Paper & Sticker Sheet (English) [ 166643 ]")
![Basic White 8 1/2" X 11" Cardstock [ 166780 ]](https://assets1.tamsnetwork.com/images/EC042017NF/166780s.jpg "Basic White 8 1/2\" X 11\" Cardstock [ 166780 ]")
![Bubble Bath 8 1/2" X 11" Cardstock [ 161718 ]](https://assets1.tamsnetwork.com/images/EC042017NF/161718s.jpg "Bubble Bath 8 1/2\" X 11\" Cardstock [ 161718 ]")
![Petunia Pop 8 1/2" X 11" Cardstock [ 163801 ]](https://assets1.tamsnetwork.com/images/EC042017NF/163801s.jpg "Petunia Pop 8 1/2\" X 11\" Cardstock [ 163801 ]")
![Garden Green 8-1/2" X 11" Cardstock [ 102584 ]](https://assets1.tamsnetwork.com/images/EC042017NF/102584s.jpg "Garden Green 8-1/2\" X 11\" Cardstock [ 102584 ]")
![Petunia Pop Classic Stampin Pad [ 163811 ]](https://assets1.tamsnetwork.com/images/EC042017NF/163811s.jpg "Petunia Pop Classic Stampin Pad [ 163811 ]")
![Blackberry Bliss Classic Stampin' Pad [ 147092 ]](https://assets1.tamsnetwork.com/images/EC042017NF/147092s.jpg "Blackberry Bliss Classic Stampin' Pad [ 147092 ]")
![Garden Green Classic Stampin' Pad [ 147089 ]](https://assets1.tamsnetwork.com/images/EC042017NF/147089s.jpg "Garden Green Classic Stampin' Pad [ 147089 ]")
![Eyelet 3D Embossing Folder [ 163414 ]](https://assets1.tamsnetwork.com/images/EC042017NF/163414s.jpg "Eyelet 3D Embossing Folder [ 163414 ]")



![Stampin' Cut & Emboss Machine [ 149653 ]](https://assets1.tamsnetwork.com/images/EC042017NF/149653s.jpg "Stampin' Cut & Emboss Machine [ 149653 ]")

Thank you for the instructions for the flip card, can’t wait to give it a try.
It’s such a fun card! Enjoy. 😊